Logging on and Making a Worksheet
This Sage worksheet is from a series of tutorials developed for the MAA PREP Workshop “Sage: Using Open-Source Mathematics Software with Undergraduates” (funding provided by NSF DUE 0817071). It is licensed under the Creative Commons Attribution-ShareAlike 3.0 license (CC BY-SA).
This document describes how to get into a Sage worksheet in the first place. If you already feel comfortable with this process, or at least comfortable enough to see how to actually use Sage, the main content of the tutorials begins with the introductory tutorial.
There are three main types of worksheets for Sage, all of which have somewhat similar behavior.
- If you are using the Jupyter notebook or starting Sage from the command line, you may see some screens about exporting. We have basic information about this.
- If you are using the CoCalc SageMath worksheets, you will want to contact them or read some of their documentation for further assistance.
- Further below, we describe the process for logging on and making a
worksheet in the legacy SageNB server, including:
- logging in for the first time
- editing a copy of a worksheet someone sent you
- making your own worksheet from scratch
The Export screen and Jupyter notebook
Starting in Sage 8.0, the default is to provide the Jupyter notebook for your worksheet experience via an export screen. When you start Sage you may see a screen like this.
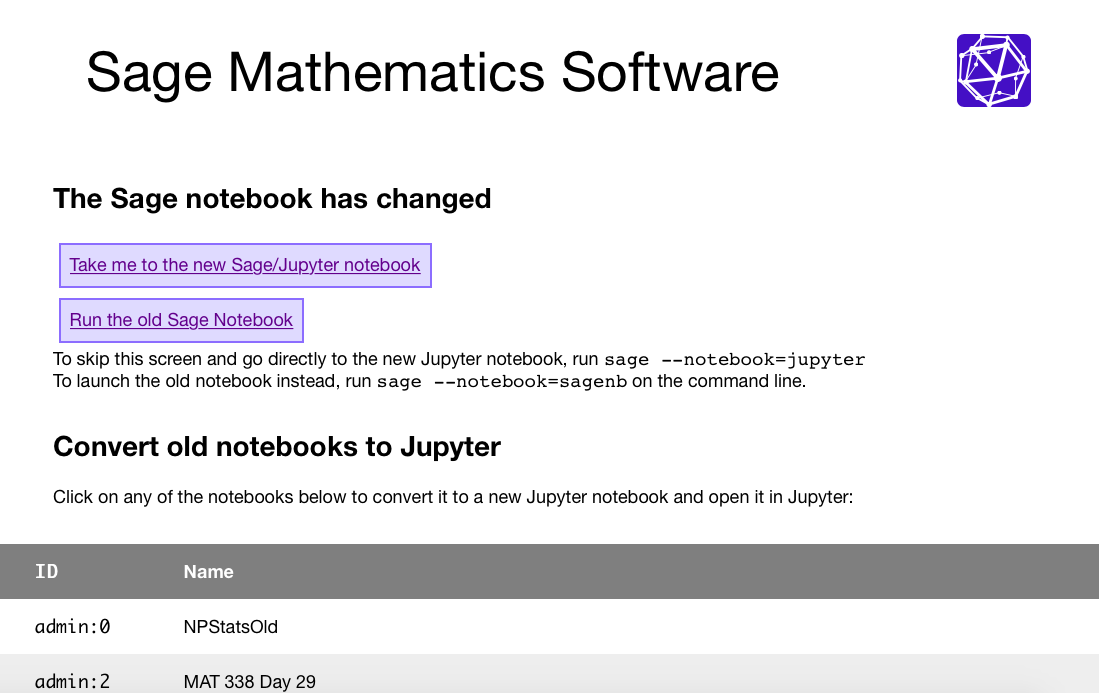
There are three actions you can take, each of which is highlighted in the next picture. Note that if you have no previous worksheets, the third option to “export” them will not make sense.
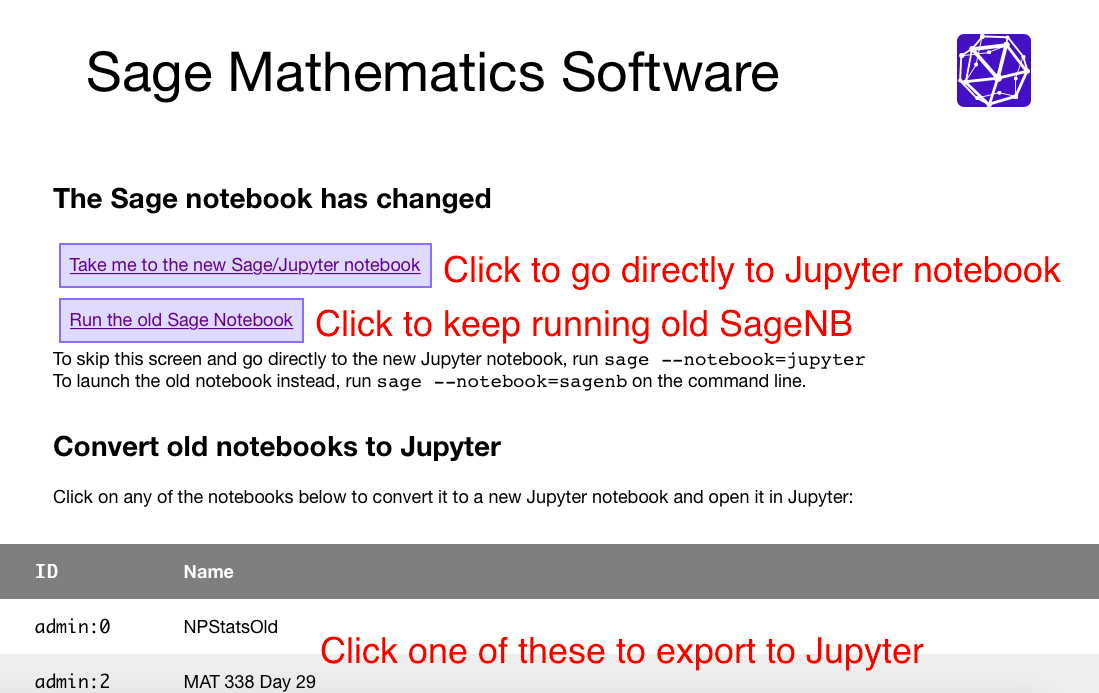
The legacy SageNB is still a powerful web app, and has some advantages, but is not longer under active development, so we recommend that new users start with the Jupyter notebook. Jupyter will bring you to a screen that is simply a listing of files in whatever folder Sage has opened in.
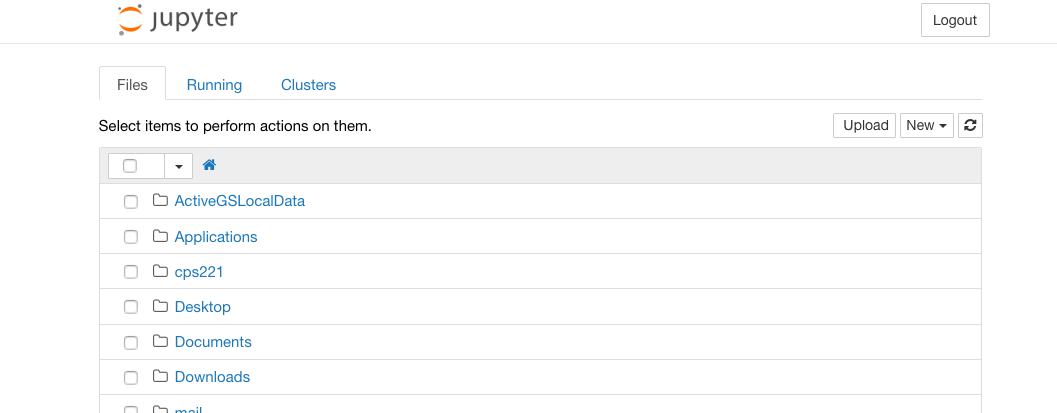
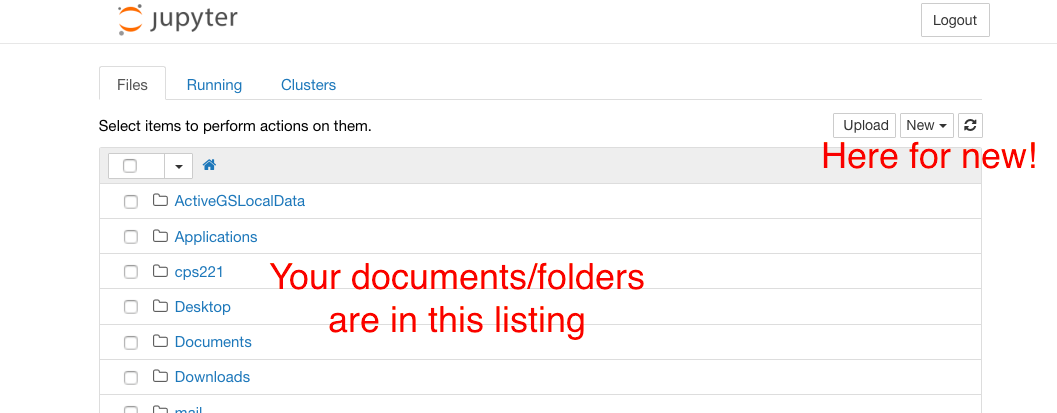
If you want to start a worksheet, you will look at the upper right corner and ask for a new worksheet:
Note
The Jupyter notebook saves your files locally in your normal filesystem, as normal file names. So if you start the notebook from a different location than usual, you may have to navigate a bit to find your worksheet.
Jupyter will allow you many types of files to open. To use SageMath directly, just choose the Sage type; this will ensure that Jupyter runs using Sage and not pure Python or some other language.
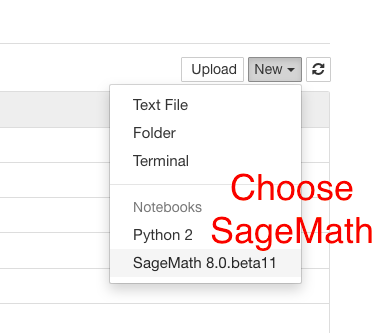
You should now have a worksheet that looks more or less like this.

Now you are ready to begin to evaluate Sage commands!
Instructions for SageNB server
Creating an Account
When coming to a Sage server for the first time, it will look something like this.
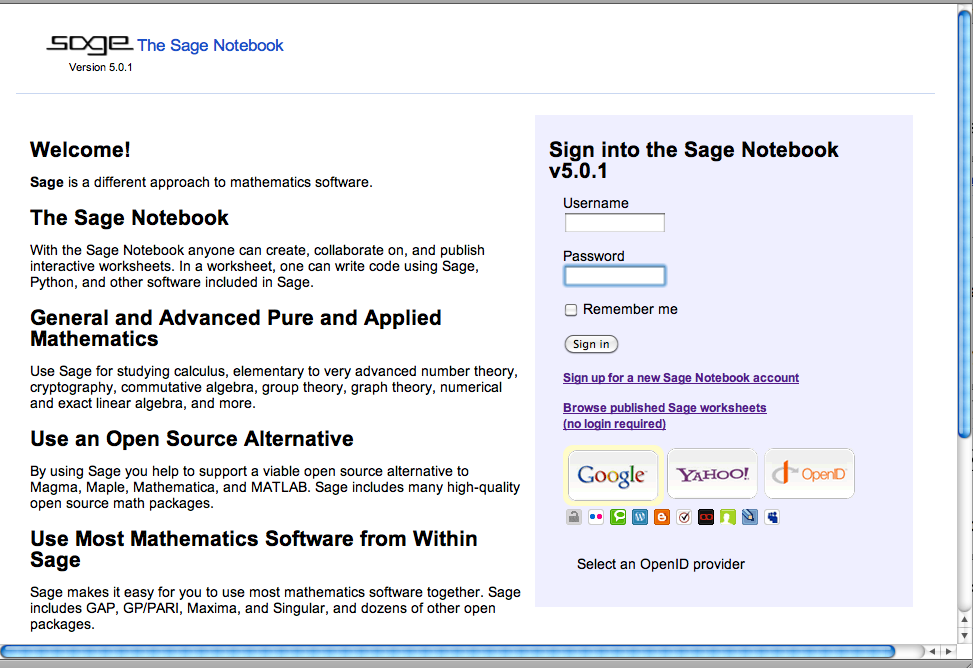
You can create an account in three ways.
- Use an OpenID account to verify your account
- Create a login in the standard way by creating a username and password.
- If you have opened it on your local machine (e.g. from the command line or the Mac app), you should be automatically logged in.
OpenID
With many public Sage servers, you can use an OpenID such as Google, Yahoo!, and so forth to create an account.
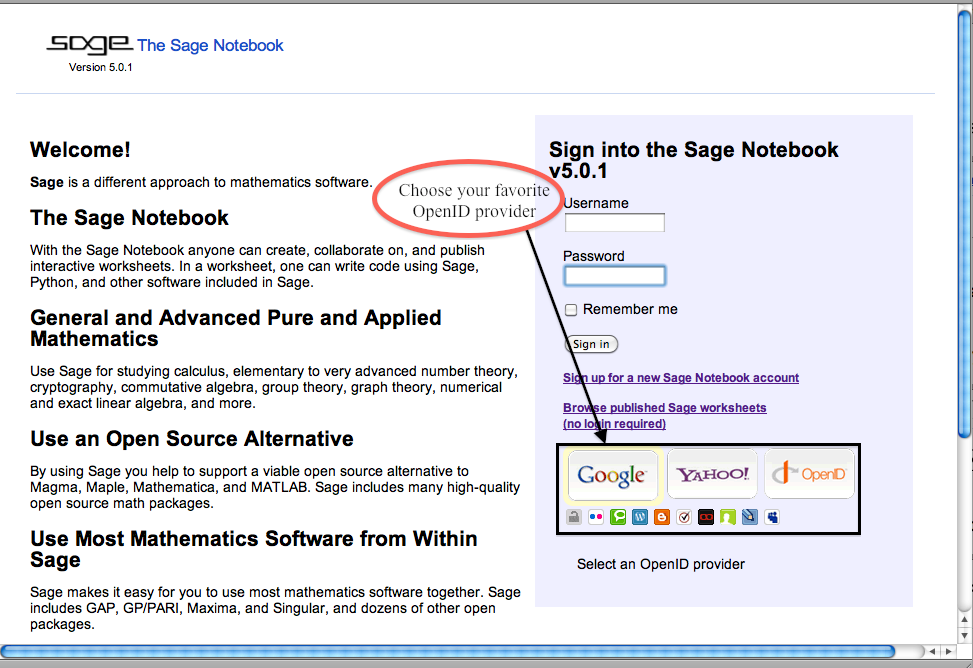
To create an account, just make sure you are logged in with your verification website, and then click the correct logo of the many on the lower right. Then you should come to a page like this.
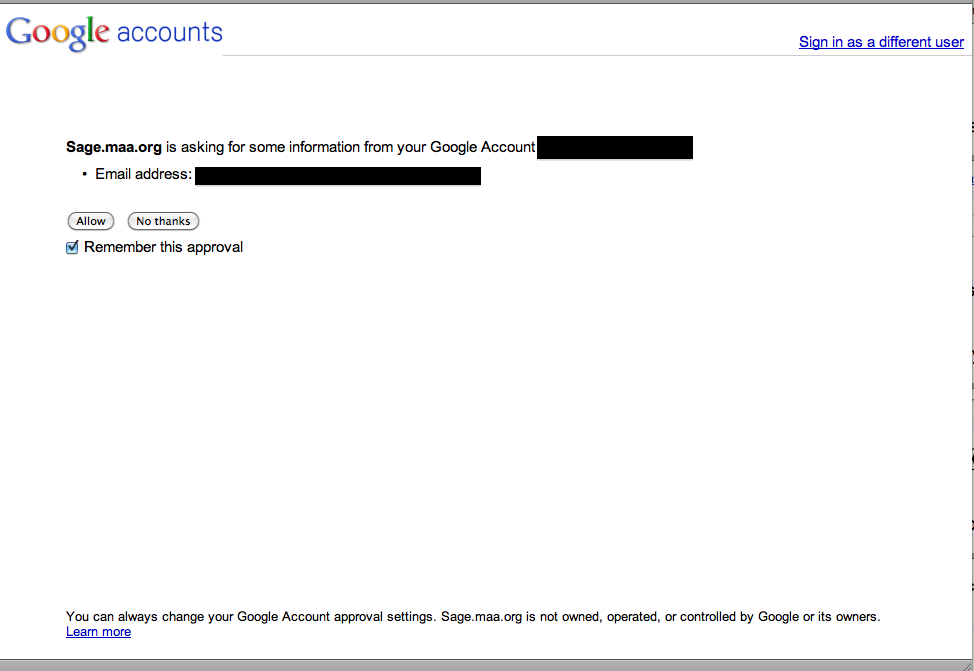
From there, you should be taken directly to your new notebook, ready to make your first worksheet.
Standard Account Creation
The normal way to create an account is quite straightforward as well.
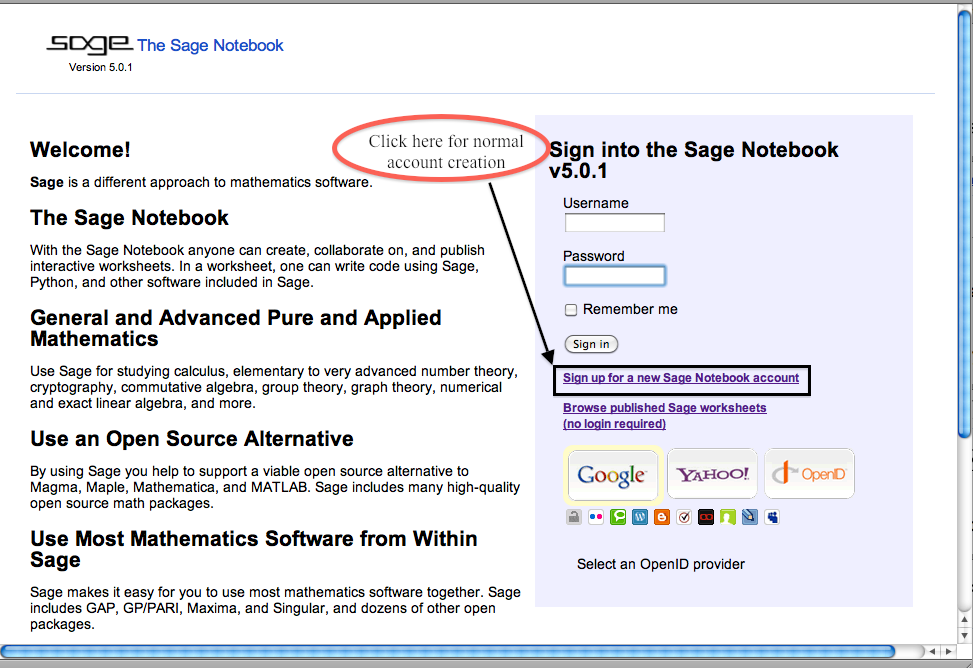
Just click on the relevant link, and you’ll be taken to a page where you create a new username and password.
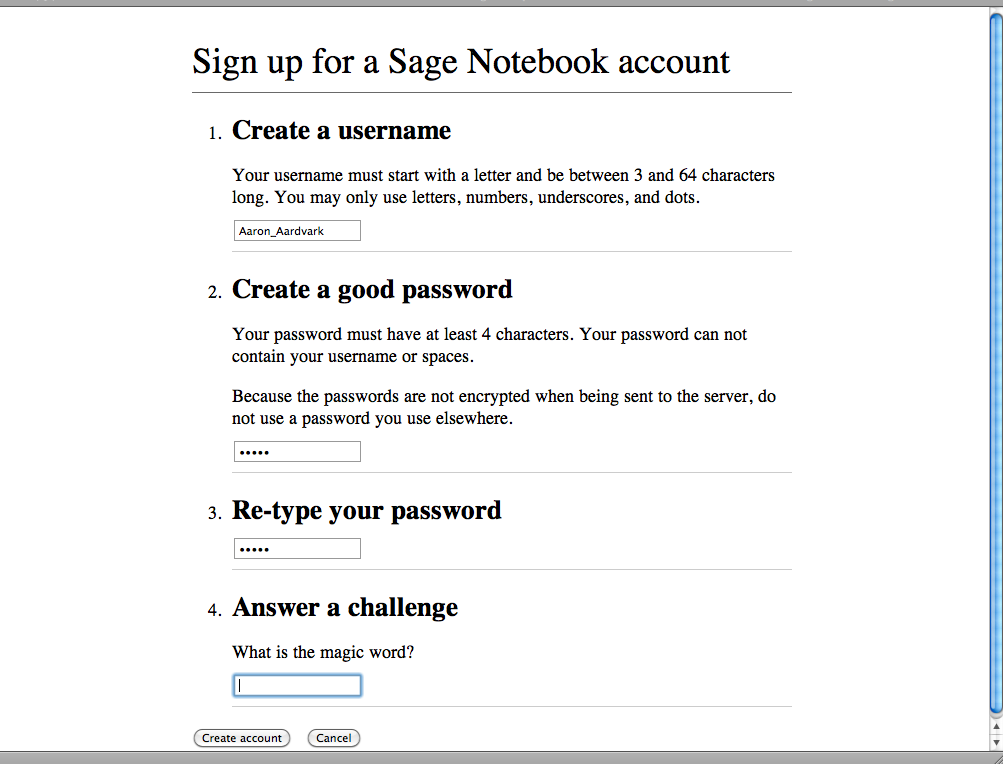
In this example, there is a “magic word”; there could be a different security question as well. In that case, you’ll have already been given the information if you’re authorized to be on that server.
In this scenario, you’ll be taken back to the main login page, where you’ll need to put in your new login information.
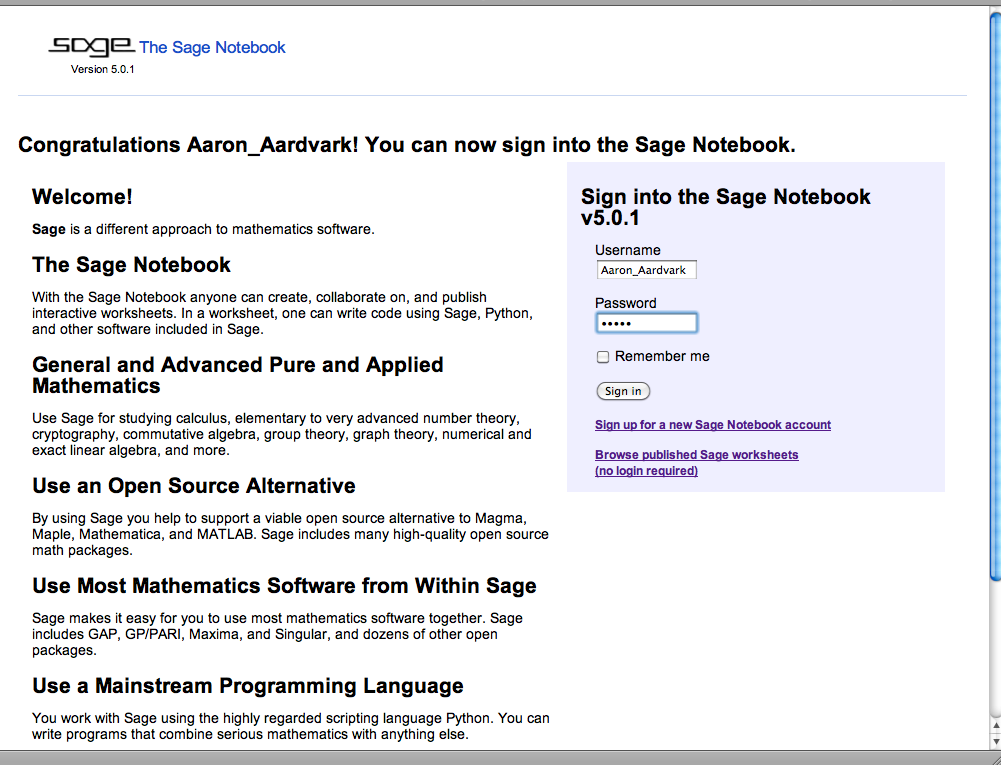
Then you’ll be sent to a new notebook, ready to make your first worksheet.
Two Usage Scenarios
There are two main scenarios when starting with Sage.
- You are running Sage locally or going to a Sage server, and just want to start trying some mathematics. We cover this situation first.
- Someone has given you a link to a published tutorial or other worksheet (perhaps one similar to this!) and you would like to try out the mathematics there, using your own editable copy of the worksheet. We cover this less common situation below.
Note
In either scenario, the Sage notebook will be saving your files in a “hidden” location not meant for ordinary users and you will ordinarily interact with your Sage worksheets only through the notebook server.
Starting a New Worksheet from Scratch
Sage on a server functions via individual documents called worksheets. If you are sent to one and you want to make a live copy, that is one thing, but usually you will start your Sage session with just an empty notebook, with no worksheets yet in it.

There are a few things you can do here, but usually you’ll want to start a new worksheet.
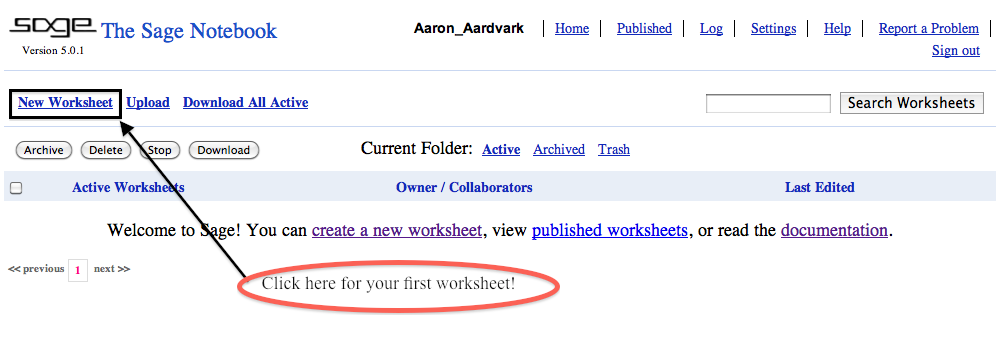
Once you’ve done this, it should look something like this:
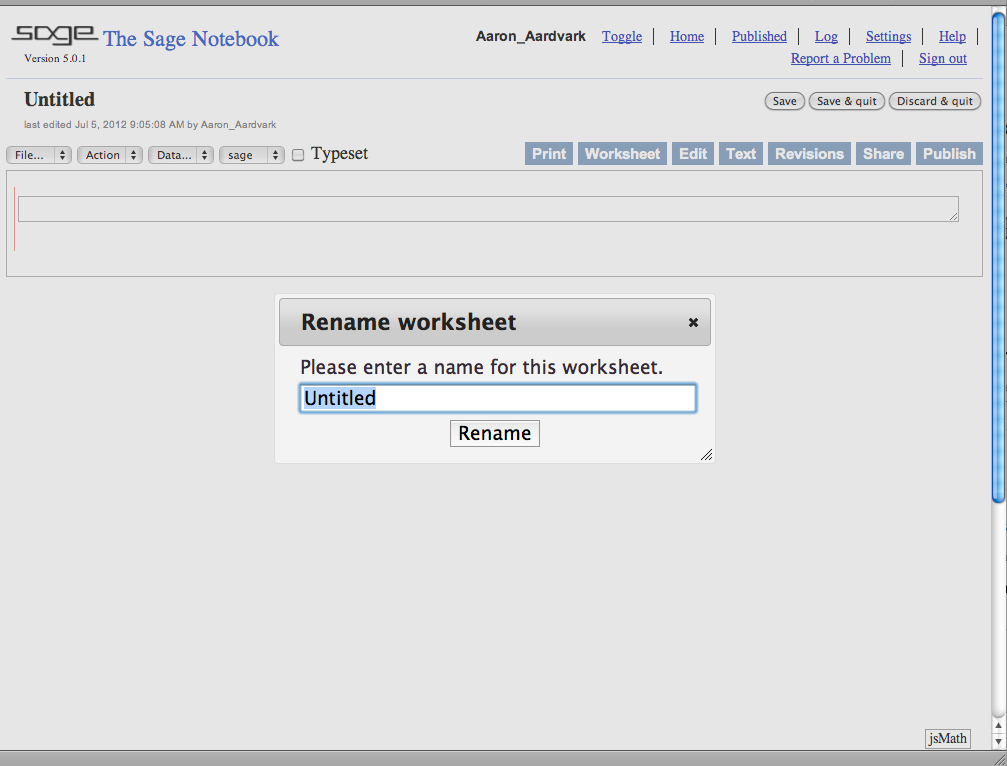
You can leave the name, or call it whatever you like. Then you should see your first “cell”, the rectangle in this picture.
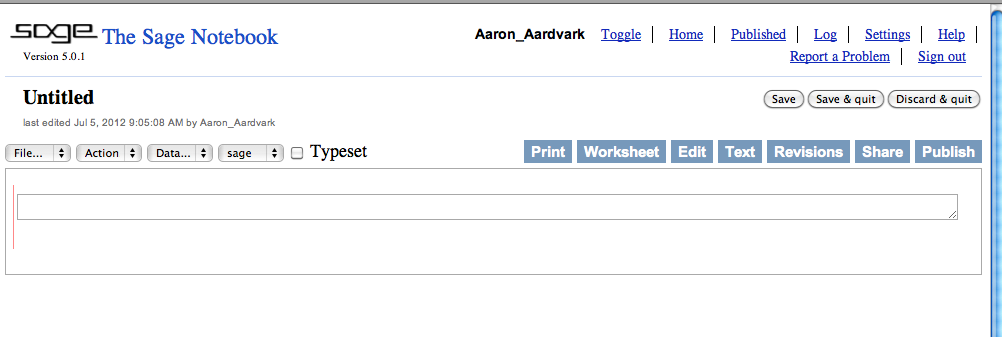
But at this point you are ready to go on evaluate Sage commands!
Getting a Live Copy of a Worksheet
Occasionally, you’ll get started with Sage by someone giving you a link to a published worksheet that someone else has created. In order to do math on it, you’ll need your own copy of the worksheet on the server.
If you are logged in and have your own copy, it should look like this at the top:

Except, of course, your username will appear! If you already have a live copy, you’re all set and should start trying it out, possibly referring to the first tutorial for tips.
More likely, you’ll need to follow a few steps.
Take another look at the top of the screen. Does it look like this?

If you already have an account on the server, log in; otherwise, you may want to review how to get an account.
Once you have an account and are logged in, you’ll need to go back to your original link for the published worksheet. In either event, the worksheet should now look like this.

Now just click ‘Edit a copy’ so that it looks like this!

Now you’re ready to learn how to actually evaluate those Sage commands! Good luck.